

When you think of embroidery, you might think of women in historical dress, sighing as they stitch, waiting for a man to call on them with a formal invitation to a dance. However, this Regency-style hobby has been given a modern facelift thanks to a rise in people taking up needlecrafts.
Embroidery allows you to personalise clothes, design cushion covers, and even make unique wall art pieces. With some basic knowledge of simple stitches and what you’ll need to get started, you’ll soon fall in love with this relaxing hobby.
Hoops – You can embroider without a hoop; however, using one will make the task easier. The hoop pulls your fabric taut for neat stitches that don’t pucker your material and makes it easier for you to see the underside, too – great if you’ve got an accidental knot you need to untangle.
Fabric – When practising, it’s a good idea to use scraps of cotton, polyester, or even denim, but you can usually use almost any cloth you have depending on the project – some seasoned stitchers like to use delicate tulle!
Thread – Almost any thread (also known as ‘floss’) can work for embroidery as the art is usually more decorative than practical. However, we suggest using cotton thread for a high-quality design and finish as this is less likely to snag and fray when pulled through the fabric.
Scissors – Embroidery scissors are small, dainty scissors designed for cutting fabric and floss. Investing in a good pair will make cutting easier for you than regular paper scissors, as they don’t have the same precision point as embroidery scissors.
Needles – No needlecraft is complete without a set of quality needles. When starting, a size 5 or 7 needle tends to be the best; however, we suggest playing around with different sizes to see what’s most comfortable for you and your projects. It’s handy to keep a tapestry needle in your collection. They’re great for when you’re working with all 6 threads at once.
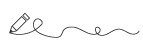
Heat Sensitive Pen – Many embroiderers like to use Frixion pens when it comes to creating their designs. By drawing your design onto your fabric with a heat-sensitive pen, you can blast a hair-dryer on the finished project to remove any remaining guidelines. Alternatively, you can use transfer paper.
Running Stitch – This is perfect for creating dashed lines and creating details, and it’s so easy, you’ll feel like an expert! Bring your needle and thread up through the back of your fabric, then down again to create the line you want, leave a space, and then come up again on repeat to create simple dashes.
Straight Stitch – The straight stitch is as simple as it sounds. Bring the needle up through the fabric and then bring it down again a few centimetres away, repeating until you cover your design. It’s perfect for creating stars, filling gaps, creating a confetti effect, adding texture, and more.
Backstitch – Another simple stitch to learn, it’s made by doing an initial straight stitch before bringing the needle back up a space ahead and then back through the same hole at the end of the first stitch. It might sound confusing to stitch backwards like this, but it’s one of the easiest stitches to do and one of the most versatile as well.
French Knot – Push your needle through the back of the fabric and wrap the excess on the top around your needle as many times as you need to create the desired effect, usually 3 times. Pulling what’s left of the thread taut, push the needle through the fabric next to the hole you initially made. This stitch makes an effective filler and is terrific at creating flowers, snow, and giving your work texture.
Split Stitch – Begin by making a straight stitch. With your needle and floss on the underside, bring them back up again through the centre of your first stitch, stitching the same length as your initial one. Repeat this as many times as you like. We like to use this stitch for flower stems and text
Stem Stitch – This one is deceptively similar to the split stitch, but instead of coming up through the centre, you come up again on the side of the stitch.
Satin Stitch – Ideal for creating a smooth finish, this stitch can cover a large area quickly. Using your design as a guide, create a straight stitch from one side to the other, bring the needle up again beside the first stitch’s opposite side, and repeat, keeping the floss as close together as possible.
Woven Wheel – If you want to create an impressive rose effect with little effort, this is the perfect one for you. Begin by stitching a five-pointed star – once you’ve stitched your star, it’s time to begin weaving. Bring the needle up close to the centre of your star, weaving the needle over and under the points, alternating between each. Over the first, under the second, over the third, and so on. Once you’ve completely covered your star, tuck the needle under the flower and pull it back through the fabric to secure. When weaving, try not to pull too tightly so you can produce a fuller effect.
We hope that you’ve found this guide useful and it’s inspired you to get stitching! Once you’ve mastered the basics, you can find a whole host of advanced stitches online to create the perfect design.
For more inspiration, why not check out the articles below and browse our full arts and crafts collection?


